On the road with Aaltje and Bort Spakenburg
Lesson 2 - When did Aaltje and Bort live?
Lesson content:
- The students work with a timeline and a family tree.
Learning objectives:
- Being able to place events from history on the timeline.
Supplies:
- Family tree of Aaltje and Bort
Timeline
- Description of the photo series
Optional: Hang a physical timeline in the classroom
Time:
- 60 minutes
Preparation:
- A few days beforehand, ask students to bring a family photo to school. The older the better! Have parents write the year of the photo on the back.

1. Photos from home
The students brought a photo of their family from home. Each student can share a story about their photo:
- Who is in the photo and what is the family connection to this person?
- Where and when was the photo taken?
Optional: If you have a physical timeline in the classroom, you can display the children's family photos on it.
Ask the following questions:
- Which photo is the youngest?
- Which photo is the oldest?
- Is the person in the oldest photo still alive?
- Did Aaltje and Bort live at the same time as this person?
- Are Aaltje and Bort still alive? (They were 9 and 10 years old in 1910.)
- Are Aaltje's children, grandchildren or great-grandchildren still alive?
New title
2. Interactive lesson! Your own family tree
You've seen the family tree of Aaltje and Bort. It's fun to create your own. You can create a family tree for free on Myheritage.nl after a simple registration.
What does your family tree look like? To begin, start with your own name and the names of your father and mother. Once you've entered this information, you'll see that you and your father and mother are immediately included in the digital family tree. Who else can you add?
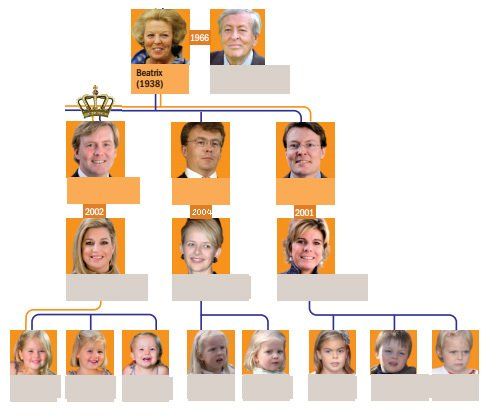
Extra assignment: Below you see the family tree of the Royal Family. The photo shows what the tree should look like. Only...we've left out all the names. Can you figure out which names belong to which pictures?